-
 Australia
-
 Austria
-
 Belgium
-
 Bosnia and Herzegovina
-
 Brazil
-
 Bulgaria
-
 Canada
-
 China
China
-
 Croatia
-
 Czech Republic
-
 Denmark
-
 Ecuador
-
 Finland
-
 France
-
 Germany
-
 Great Britain
-
 Greece
-
 Hong Kong
-
 Hungary
-
 India
India
-
 Indonesia
-
 International
-
 Iran
Iran
-
 Israel
-
 Italy
Italy
-
 Japan
Japan
-
 Liechtenstein
-
 Luxembourg
-
 Malaysia
-
 Malta
Malta
-
 Mexico
-
 Montenegro
-
 Netherlands
-
 North Macedonia
-
 Norway
-
 Philippines
-
 Poland
-
 Portugal
-
 Republic of Singapore
-
 Romania
-
 Serbia
-
 Slovakia
-
 Slovenia
-
 South Africa
-
 South Korea
-
 Spain
Spain
-
 Sweden
-
 Switzerland
-
 Taiwan
-
 Thailand
-
 Turkey
-
 USA
USA
-
 Vietnam
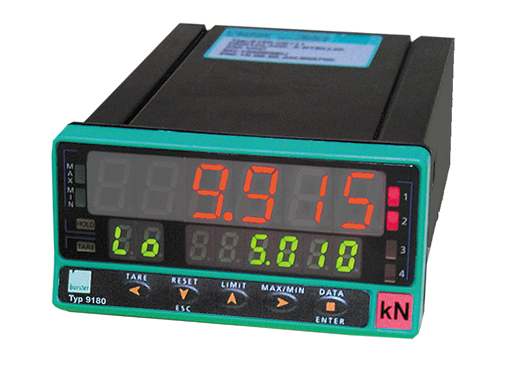
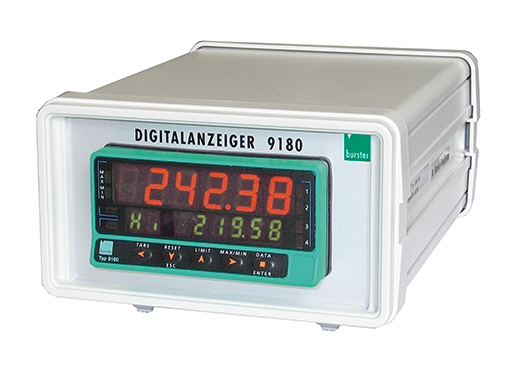
9180 Digital Display for Strain Gauge Units, Potentiometers, DC/DC Sensors and Standard Signals
Highly accurate, 2 displays for min and max peak values, RS232 or RS485, TARA and HOLD functions, optional: powerful PC software for collection and processing of measured data
Too many products selected
Please notice that there is a limit of 5 products for the product comparison.
Your latest selection was canceled.
×-
Features
- Up to 8 sensor parameters can be saved (optional)
- For force, pressure or torque measurements using strain gauge sensors
- For distance or angle measurements with potentiometer or DC/DC sensors
- Processing of standard signals ± 1 V/ 10 V/ 0 ... 1 mA, 0 (4) ... 20 mA
- Min. or max. peak values via an additional display
- TARE and HOLD function
- Generation of up to 4 limit signals (optional)
- RS232 or RS485 (optional)
- Analog or BCD output (optional)
- Measurement accuracy < 0.1 %
- Scaling possible using teach-in procedure or by entering sensor data directly
- Convenient configuration and evaluation software DigiVision
-
Product data
Model 9180 Measurement accuracy 0.1 % F.S. Sample rate 16/s Type of sensor - Strain gauge
- Potentiometer
- Standard signals
- DC/DC
- Transmitter
Interfaces - RS232
- RS485
- BCD
Indicator ± 999 999 Sensor excitation Strain gauge:
- 10 V / 120 mA
- 5 V /120 mA
Potentiometer:
- 10 V / 120 mA
- 5 V / 120 mA
Standard signals, DC/DC sensors and transmitters:
- ± 1 V / ± 10 V
Protection class IP65 Supply voltage - 115/230 VAC, 50/60 Hz
- 24/48 VAC, 50/60 Hz
Measurement channels 16 Specific characteristics - Up to 8 sensor parameters can be saved (optional)
- For force, pressure or torque measurements using strain gauge sensors
- For distance or angle measurements with potentiometer or DC/DC sensors
- Processing of standard signals ± 1 V/ 10 V/ 0 ... 1 mA, 0 (4) ... 20 mA
- Min. or max. peak values via an additional display
- TARE and HOLD function
- Generation of up to 4 limit signals (optional)
- Analog output (optional)
- Scaling possible using teach-in procedure or by entering sensor data directly
- Convenient configuration and evaluation software DigiVision
-
Description
Model 9180 supports force, pressure and torque sensors operating on the strain gauge principle, as well as the connection of position and angle sensors in potentiometer or DC/DC configuration. It also allows the measurement of process signals ± 1 V/ 5 V/ 10 V or 0 ...1 mA, 0(4) ... 20 mA. The current measured value is indicated on the 14 mm high LED main display, while a second display located directly below provides a reading of the peak value.
The display is particularly suitable for highly accurate measurements due to the high accuracy of 0.1%. It is also possible to monitor up to 4 limit values and provide the results via relay or transistor outputs. Thus the process value display can be used for classification, process and control tasks. The current measured value is frozen on the display by activating an external HOLD signal. The TARE function is useful for balancing out previous loads for example. The optional serial interface can be used to transfer measured values and perform device settings. Powerful PC software is available for this on request.
State-of-the-art microprocessor technology has allowed the realization of numerous special functions for practical use. Menu guidance of device setup is standard. Selfexplanatory abbreviations greatly facilitate this process so that even inexperienced users can manage without operating instructions. First, the user specifies the type of input signal or sensor. Strain gauge, potentiometer or process signals 0 ...1 mA, 4 ...20 mA or ± 1 V, ± 10 V as well as DC/ DC sensors can be selected. Then the calibration process is selected. Users can choose between teach-in or calibration depending on the sensor protocol. The decimal point can be moved as required. The sensor excitation stated in the technical specifications is set automatically upon selection of the sensor type except with process signals. A choice of three excitations is available for process signals. Complete electrical isolation of the measurement channel prevents measurement values from being falsified by ground loops.
-
Data Sheet & Downloads
Data sheetOperation manualSoftwareFurther info -
Accessories
-
Application Examples
Related products
Germany

burster praezisionsmesstechnik gmbh & co kg
Talstr. 1-5
76593 Gernsbach
Germany
Fon: +49 7224645-0
Fax: +49 7224645-88
infoburster.com
www.burster.com
Trade fairs
The Battery Show
18.06. -
20.06.24 -
Stuttgart,
70269,
Deutschland
burster gmbh & co kg
sensors & precision measurement
Talstr. 1-5
76593 Gernsbach
GERMANY
Contact:
Phone: (+49) 07224-6450
Fax: (+49) 07224-64588
E-Mail:
infoburster.de
The measurement solution.
It‘s with this ambition and for over half a century burster, a global player in the precision measurement technology industry, supplies some of the world’s most recognizable brands with sensors, precision measuring devices and measuring systems for sensor signaling processing. This is all done through our research, development and production headquarters in Germany.
Where quality assurance and production control play a significant role, burster is on board.

